Frequently Asked Questions
How to EM - Bulk Enrollment via Active Directory
This tutorial briefly explains how you can install the EM agent on multiple Windows endpoints using Active Directory and group policy (GPO) and enroll them for management.
Software Requirements
Step 1 - Configure the offline EM package
The Endpoint Manager communication client package is unique for each company and user. All endpoints that have a client installed upon them will be listed under the logged in user name or as configured in the 'User' field on the form below.
To configure the offline package
The interface for configuring and downloading the bulk installation package opens on the right.
Step 2 - Download the EM agent
The next step is to download the EM communication client package for Windows devices.
After downloading the client package, save it on the AD server from where you want to enroll the endpoints.
Step 3 - Create a shared network folder and configure permission level
Now that you have downloaded the .msi setup file, the next step is to create a shared folder in the network.
Step 4 - Create a Group Policy and Assign the package
The next step is to create a group policy that will install the client package onto the endpoints.
The 'Group Policy Management Editor' will be displayed.


Step 5 - Run a GPO update
In order to install the EM client package, you need to run a GPO update in the command prompt.
The group policy update will run and a confirmation message displayed:
After the group policy has been successfully updated, the endpoints must be restarted for the EM communication client to be installed.
That's it. You have now successfully enrolled Windows endpoints via AD using the GPO method. You can see the endpoints listed in the 'Devices List' screen.
The device group policy that was selected in the enrollment form will be applied to the enrolled devices automatically. If you have configured proxy settings and downloaded the .mst file then go to Step 6 to add the MST file to the newly created GPO.
Step 6 - Add MST file to the GPO
If you want to include the MST file to the GPO, then download the file after providing the details in the proxy settings fields in the form.
The 'Group Policy Management Editor' will open.
The 'Deploy Software' dialog will open.


After first successful connection, the device group profile(s) will be applied and the client proxy settings will take over. Make sure the profile(s) (via device, device group, user and/or user group profiles) applied to the enrolled devices contain the same proxy settings in the client proxy settings component.
Software Requirements
- AD Server – Windows Server 2008 or higher
- Endpoints – Windows 7 or higher
Step 1 - Configure the offline EM package
The Endpoint Manager communication client package is unique for each company and user. All endpoints that have a client installed upon them will be listed under the logged in user name or as configured in the 'User' field on the form below.
To configure the offline package
- Login to Endpoint Manager
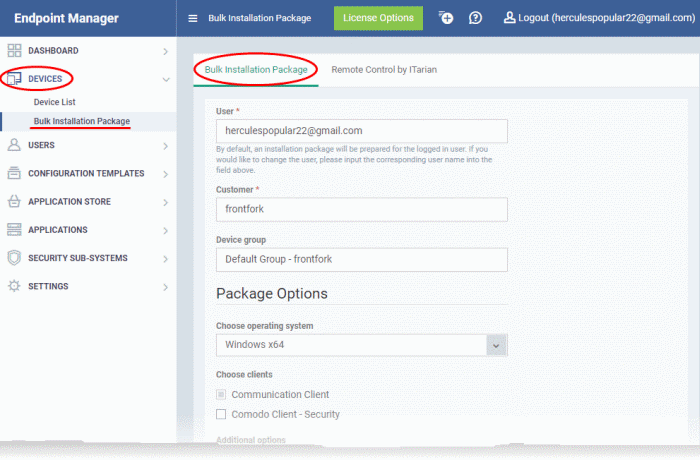
- Click 'Devices' > 'Bulk Installation Package'
- Select the 'Bulk Installation Package' tab
The interface for configuring and downloading the bulk installation package opens on the right.
| Bulk Installation Package - Form Parameters | |
|---|---|
| Parameter | Description |
| User | Devices that are enrolled by installing the communication client through AD Group Policy are assigned to the currently logged-in administrator by default. If you want the devices to be assigned to a different user, specify the user.
|
| Company | Choose the customer organization to which the endpoints should be assigned.
|
| Device Group | The device group to which the enrolled devices should be added (optional). Any group profiles will also be applied to the devices you add. |
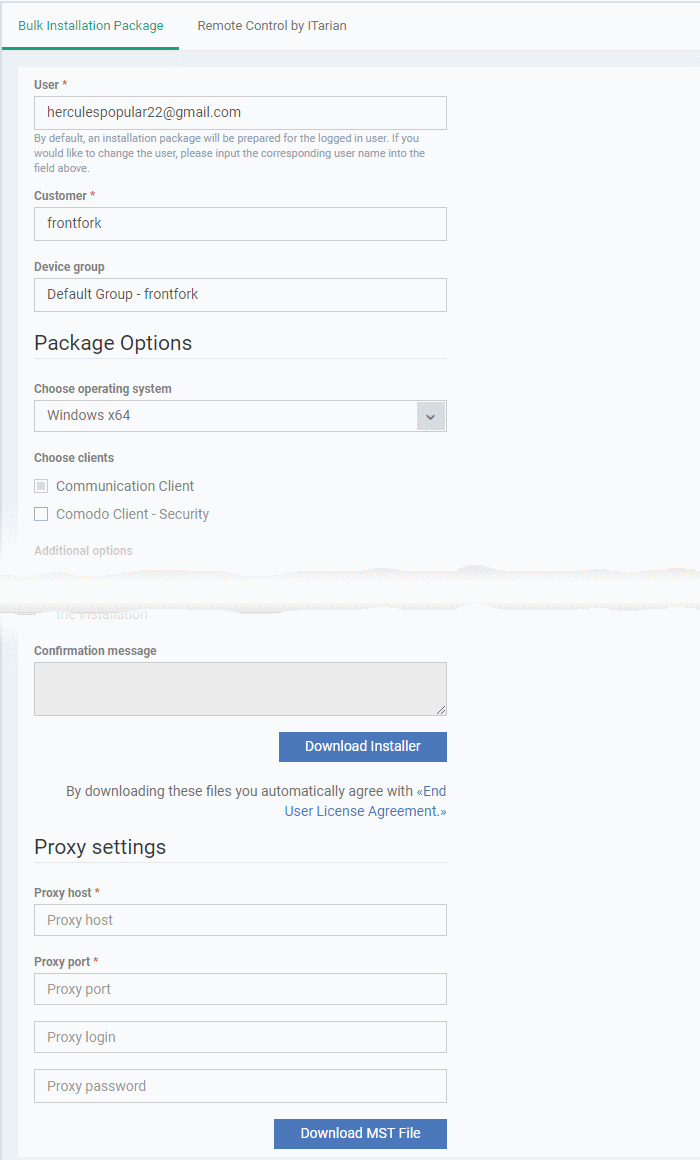
| Package Options | Operating system – Choose the OS of the target endpoints. Clients:
The rest of the configuration options related to CCS will not be enabled, if 'Security' is not selected under 'Choose clients'. |
| Restart Control Options | CCS only. Endpoints need to be restarted to complete CCS installation. You have the following restart options:
|
| UI Options | Configure which messages are shown to the user regarding the installation.
|
| Proxy Settings | Proxy settings allows you to specify a proxy server through which Comodo Client Security (CCS) and the communication client (CC) on the endpoints should connect to EM management portal and Comodo servers. If you choose not to set these, then CCS and CC will connect directly as per the network settings.
|
- If you do not wish to use a proxy server for CCS and CC then click 'Download Installer' after configuring user, company, group and client options.
- If you wish to use a proxy then additionally complete the 'Proxy settings' section and click 'Download MST File'
Step 2 - Download the EM agent
The next step is to download the EM communication client package for Windows devices.
- Read the EULA in full by clicking the 'End User License Agreement' link.
- Click 'Download Installer' to download the client package setup file for direct installation via Group Policy Object (GPO),
- To download the installation file to include a proxy server for CCC and CCS communication to EM and Comodo servers, click 'Download MST File'
After downloading the client package, save it on the AD server from where you want to enroll the endpoints.
Step 3 - Create a shared network folder and configure permission level
Now that you have downloaded the .msi setup file, the next step is to create a shared folder in the network.
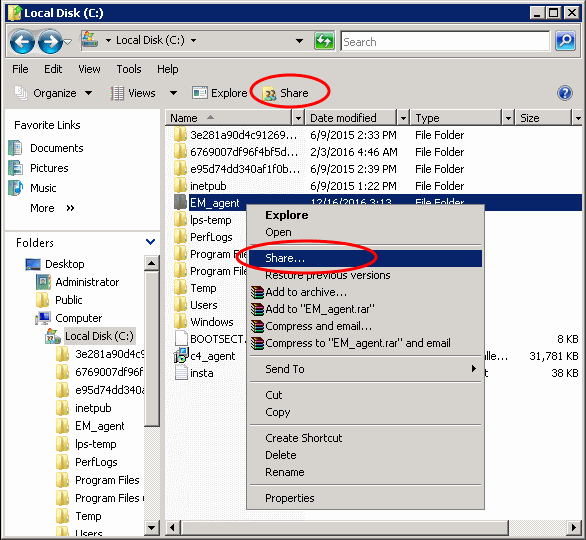
- Create a new folder in your desired location
- Name the folder appropriately. For example 'EM_agent'
- Select the folder, right-click and select 'Share' or from the menu toolbar
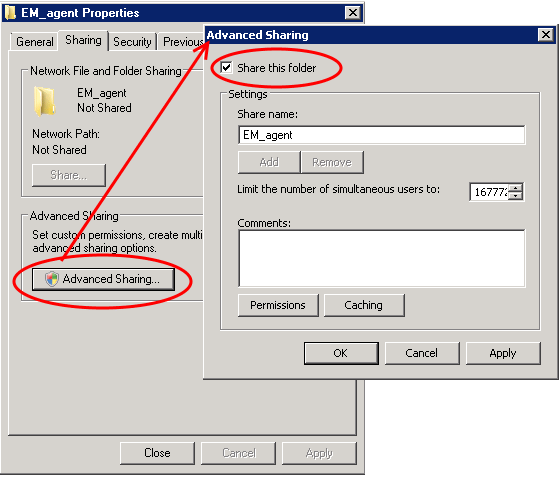
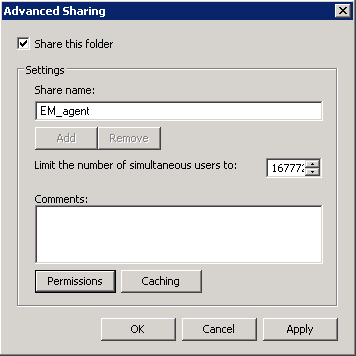
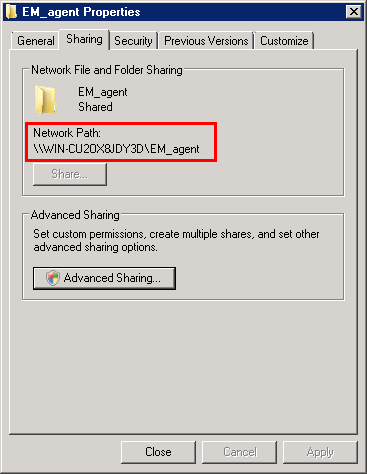
- Click 'Advanced Sharing...', then select the 'Share this folder' check box
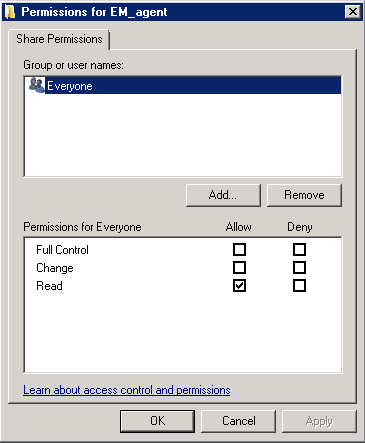
- Click 'Permissions'. By default, 'Everyone' will be selected. Since all endpoints need to have at least read access to this shared folder, make sure the permission is configured for 'Everyone'
- Ensure the 'Permission Level' is set to 'Read' and click 'OK'.
- Click 'Apply', then 'OK' in the 'Advanced Sharing' dialog.
- Note down the location of this shared folder and click the 'Close' button
Step 4 - Create a Group Policy and Assign the package
The next step is to create a group policy that will install the client package onto the endpoints.
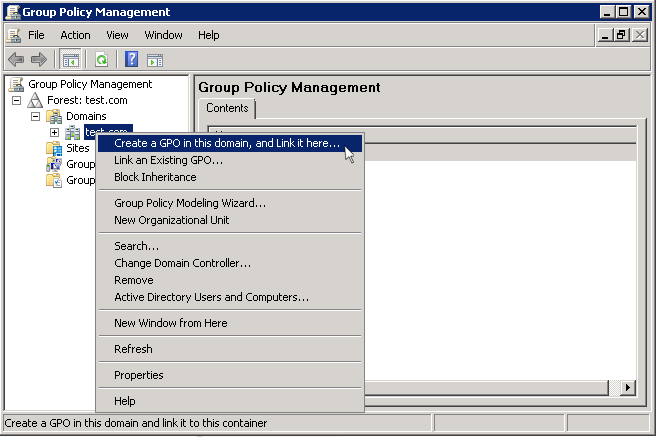
- Click 'Start' > 'Administrative Tools' > 'Group Policy Management'
- Right-click on the domain name and select the 'Create a GPO in this domain and Link it here...' option
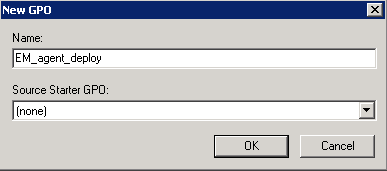
- Enter a name for the group policy in the 'New GPO' dialog
- Click 'OK'
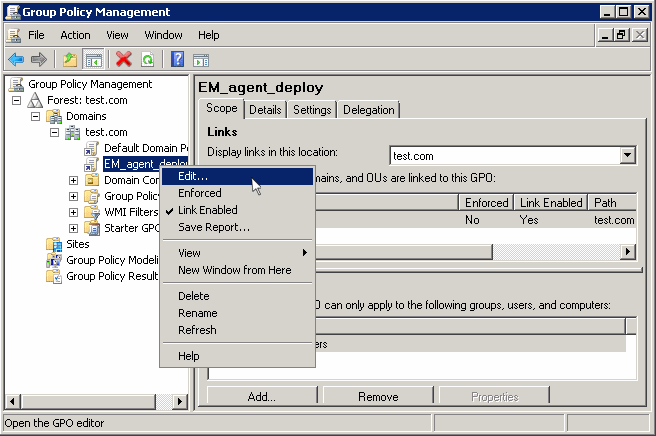
- Right-click on the policy and click the 'Edit' option
The 'Group Policy Management Editor' will be displayed.
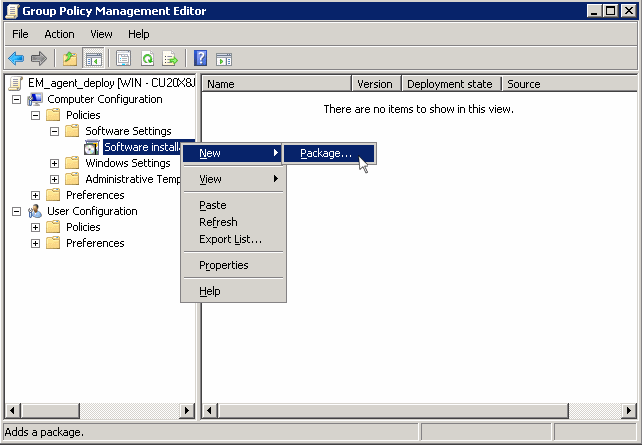
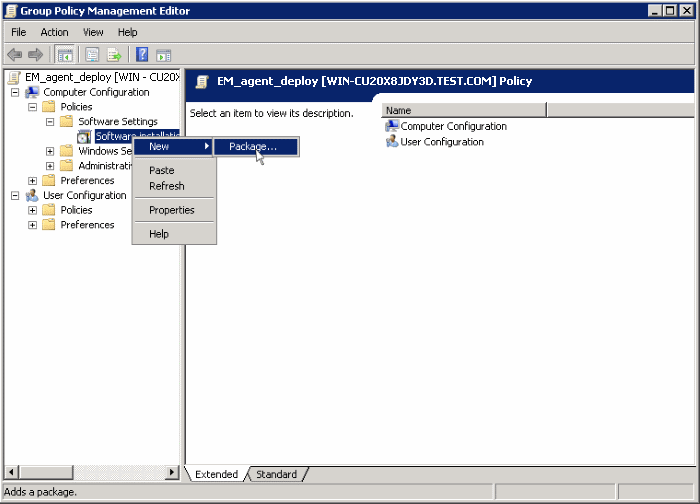
- Expand 'Computer Configuration' > 'Policies' > 'Software Settings'
- Right-click on 'Software installation' and select 'New' > 'Package'
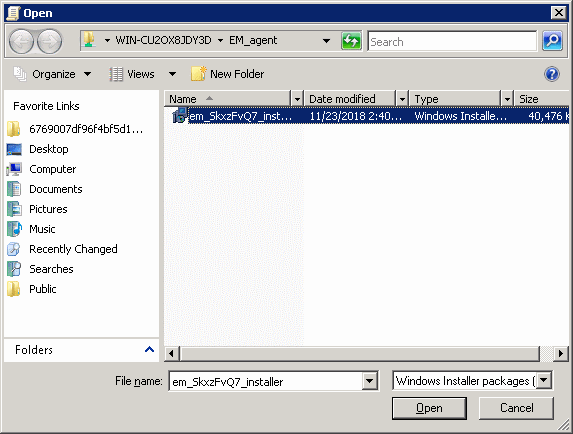
- In the 'Open' dialog, enter the path of the shared folder that was noted before, select the file and click the 'Open' button
- Select the file and click 'Open'
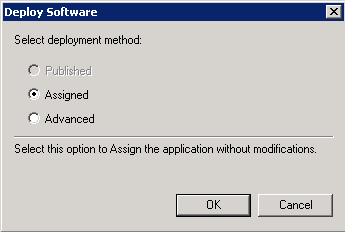
- In the 'Deploy Software' dialog, select 'Assigned'
- Click 'OK'
Step 5 - Run a GPO update
In order to install the EM client package, you need to run a GPO update in the command prompt.
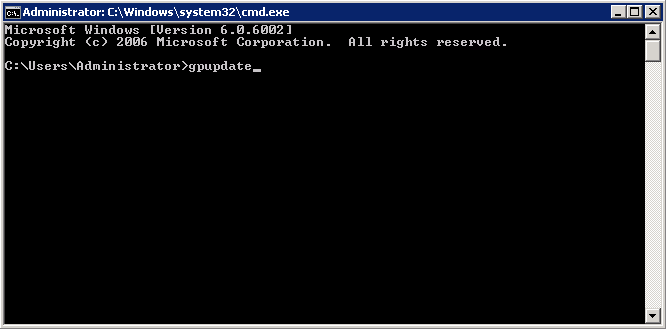
- Open the command prompt, type gpupdate and press enter.
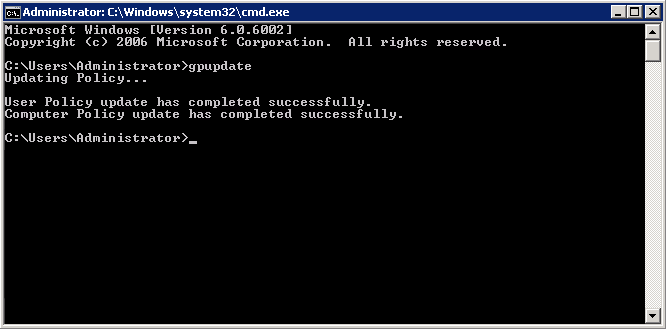
The group policy update will run and a confirmation message displayed:
After the group policy has been successfully updated, the endpoints must be restarted for the EM communication client to be installed.
That's it. You have now successfully enrolled Windows endpoints via AD using the GPO method. You can see the endpoints listed in the 'Devices List' screen.
| Note: You may get an error message if you try to manually install the EM communication client on an endpoint where the GPO was deployed and then removed. Visit the Microsoft support site athttps://support.microsoft.com/en-us/mats/program_install_and_uninstall and run the tool on the endpoint. |
The device group policy that was selected in the enrollment form will be applied to the enrolled devices automatically. If you have configured proxy settings and downloaded the .mst file then go to Step 6 to add the MST file to the newly created GPO.
Step 6 - Add MST file to the GPO
If you want to include the MST file to the GPO, then download the file after providing the details in the proxy settings fields in the form.
- After downloading the file, save it on the AD server and create a shared folder as explained in Step 3.
- If you are adding both MSI and MST files at one go, then select 'Advanced' at the end of Step 4.
- If you are adding the file later on, then open Group Policy Management, right click on the policy, then click 'Edit'
The 'Group Policy Management Editor' will open.
- Expand 'Computer Configuration' and right-click on 'Software Installation'
- Click 'New', then 'Package'
- Click 'Open'
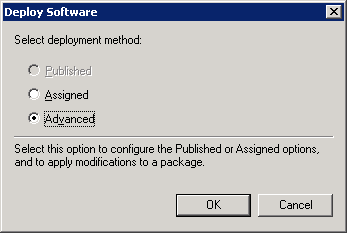
The 'Deploy Software' dialog will open.
- Select 'Advanced' and click 'OK'. If you select any other option, then you won't be able to add the MST file.
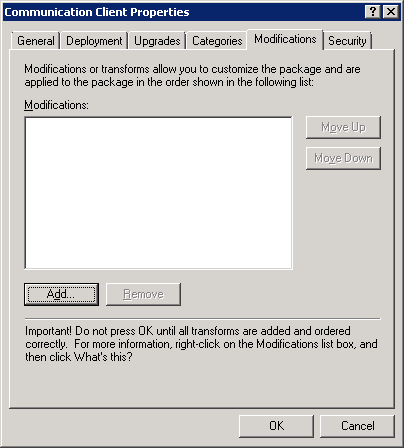
- Click 'Modifications' tab
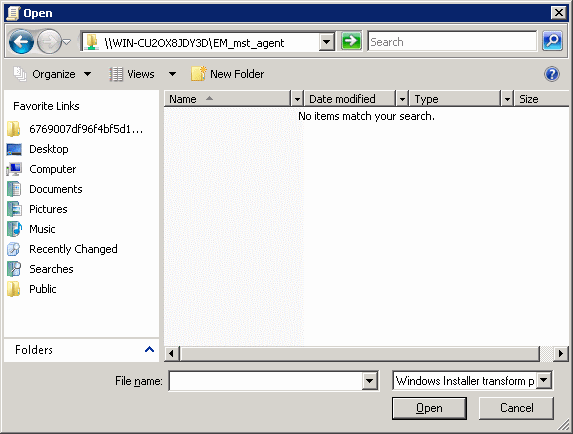
- Click 'Add' and enter the location of the shared MST file in the open dialog.
- Click 'Open'
- Click 'Open' again.
- Click 'OK' to complete the setup.
- Open the command prompt, type gpupdate and press enter to update the GPO.
After first successful connection, the device group profile(s) will be applied and the client proxy settings will take over. Make sure the profile(s) (via device, device group, user and/or user group profiles) applied to the enrolled devices contain the same proxy settings in the client proxy settings component.
Last updated 12/23/2018 5:56 pm
Please Wait!
Please wait... it will take a second!